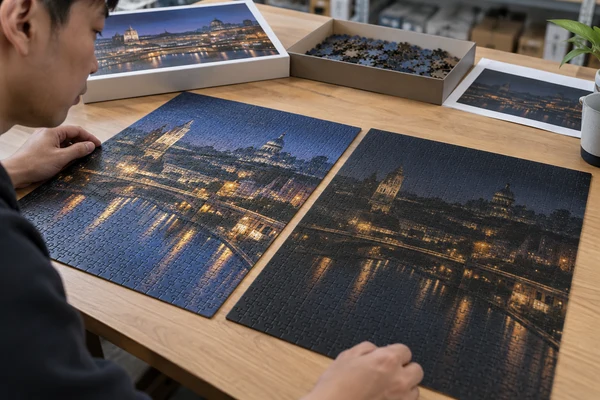
For custom puzzle dark image printing, preserve distinctions inside the shadows rather than brightening the entire scene. Identify important dark features, check whether the source contains recoverable detail, make controlled local corrections and compare physical proofs on the proposed print surface. A night skyline should still feel like night, but customers need landmarks they can recognise on individual pieces. This guide helps art publishers, photography brands and private-label buyers diagnose a disappointing dark proof and decide what to change. It focuses on proof correction and approval; the factory's actual file requirements and output conditions still need confirmation for each project.
What should custom puzzle dark image printing preserve?
Start with the image's intended mood and its assembly landmarks. A dark forest may rely on branches, paths and small areas of reflected light. A night-city photograph may rely on rooflines, window groups and water reflections. Identify the elements that distinguish one region from another. The purpose of correction is to retain useful separation between those elements, not to make every shadow equally bright.
Mark several review areas on a copy of the artwork. For a hypothetical city image, select a shaded building face, an unlit roof, the water beneath a bridge and a bright sign. Include a highlight so reviewers can see whether shadow correction damages the rest of the scene. Give each area a simple identifier and describe what must remain visible; do not turn those descriptions into unsupported numeric acceptance limits.
Judge the composition at the intended puzzle size. Details that look clear while zoomed in may become indistinct on a loose piece. Assemble a small dark region from a representative sample and compare its visual clues with the reference image. The art-puzzle format is a discussion starting point, but piece count alone does not make a dark photograph suitable. Finished dimensions, cut and the image itself matter together.
Diagnose the source before changing the print file
First determine whether the issue exists in the source, the conversion, the proof or the viewing conditions. Open the highest-quality available original and compare it with the released print file. If the original contains texture that the output file lacks, investigate the editing and conversion path. If the original already has featureless black areas, ask whether another capture or a different composition is available.
Adobe explains that histograms show the distribution of image tones, including shadows, midtones and highlights. Examine both the full image and the selected review areas. A night scene can legitimately contain many dark pixels; a left-heavy histogram is not automatically a defect. Use it to ask where information exists, then inspect the actual subject rather than imposing a standard curve on every image.
Check channels when a dark colour is central to the art. A blue jacket and a neutral wall can look similarly dark overall while depending on different colour relationships. Also look for compression blocks, noise and sharpening outlines. Brightening those faults may make the image less convincing. Save observations before editing so the team can tell whether a revised proof solved the original problem or simply produced a different look.
| Observation | Question to resolve | Useful next comparison |
|---|---|---|
| Texture absent in original | Is recoverable information available? | Higher-quality original or alternate capture |
| Original clear, output flat | Where did tonal separation change? | Original versus released file |
| Only finished sample looks muddy | Does finish or substrate change appearance? | Representative finished proofs |
| Reviewers disagree strongly | Are viewing conditions comparable? | Same proof under agreed lighting |
Correct selected shadows while keeping the intended mood
Make corrections on a duplicate or through an editable adjustment workflow. Name the baseline and each test version clearly. Begin with the problem region rather than a global brightness increase. A mask can protect bright lamps while adjusting the shaded building beside them. Compare the corrected region with surrounding tones so the result still looks connected to the photograph.
Adobe's shadow and highlight guidance warns that excessive clipping reduces detail and strong adjustments can introduce unnatural transitions or halos. That supports a cautious comparison process rather than a universal slider setting. Different photographs need different treatment. Check edges around trees, rooflines and faces after every meaningful correction, especially where a bright background meets a dark foreground.
Avoid treating custom puzzle black level printing as a request for the deepest possible black everywhere. Some deliberately solid areas can remain dark, while nearby textures need separation. Tell the prepress team which black regions are intentional and which are failing to reproduce. A written distinction helps prevent a correction that improves roof detail but weakens the dramatic background the artist intended. Keep the artist or authorised creative approver involved when a correction changes the character of the work.
Build a proof comparison that answers one question at a time
Create a small comparison ladder instead of requesting repeated vague improvements. An illustrative set might contain three versions: the current file, a restrained local shadow adjustment and a slightly stronger adjustment. These are test options, not factory performance benchmarks. Hold the crop, output preparation and proposed finish constant so a reviewer can attribute the difference to the correction being evaluated.
A custom puzzle color proof should identify its file version, output method and what it represents. A desktop print can help discuss layout but may not represent the production surface. A printed sheet can reveal tones but may omit the finish or mounting. Ask the supplier to explain the proof's limitations. Choose the next sample according to the question still open rather than treating every object called a proof as equally authoritative.
For a customer asking 'how do I avoid dark custom puzzle printing?', the practical answer is a controlled comparison with stated acceptance observations. Write, for example, that the shoreline remains distinguishable from the water and that the bridge retains its intended silhouette. Avoid the instruction 'make it ten percent brighter' unless the team has defined exactly what operation that means. Attach the observations to the chosen physical reference and approved file version.
Keep a compact proof log
Record the source version, correction description, proof construction, viewing conditions, reviewer and decision. Photograph the comparison for communication, but retain the physical proof when possible. A phone image can change exposure and white balance, so it should help locate an issue rather than become the sole colour approval reference.
Discuss a dark-artwork proof
Send your proposed image, finished dimensions and the shadow regions that need review. We can discuss the proof questions and manufacturing scope before release.
Review screen simulations and physical samples consistently
A bright monitor can make a weak shadow region appear easier to see than it is on paper. Turn off automatic display changes that interfere with comparison and use a consistent review environment. Ask the print team which output profile and simulation settings represent the proposed process. Do not choose an arbitrary profile simply because it makes the scene look attractive.
Adobe's soft-proofing documentation states that reliability depends on the monitor, device profiles and ambient lighting. Soft proofing is useful for anticipating a change, while a representative physical sample answers questions about the actual surface. Keep these roles clear during custom puzzle color matching. A screen simulation cannot demonstrate the feel, glare or handling of a mounted and finished puzzle.
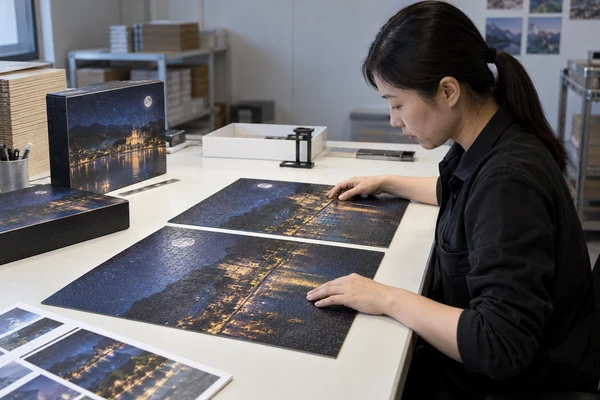
Place competing physical proofs beside one another under the same neutral review lighting. Avoid reviewing one by a window and another under a warm lamp, or comparing a fresh sample with an old faded print. Turn the samples gently to examine reflections, then return to the common viewing position. Also consider a plausible home-table setting: if customers must hunt for a special angle to distinguish important regions, the image or finish may need another review.
 PuzzleZa
Check the finish, cut and reference image together
A correction approved on an unfinished sheet still needs review on the intended product. Look at how reflections, surface texture and cut lines affect dark areas. No finish is automatically best for every night photograph. Compare the options actually proposed for the project, using the same corrected image where possible. Document the chosen construction instead of advertising a general promise that dark art will always print perfectly.
Separate selected pieces from a dark region and assess what remains identifiable. A large luminous landmark can look impressive on the assembled sheet but disappear from most surrounding pieces. Where the resulting experience is intentionally difficult, explain that accurately in product positioning. Where a broad audience is intended, consider a different crop, additional natural landmarks or a more suitable image before attempting aggressive correction.
Custom puzzle photo reproduction also includes the box and any poster. Those components may use different paper or print conditions, so ask for a coordinated review. The reference should show the approved crop and believable tonal relationships, even if the appearance cannot be identical across materials. The general colour-management guide covers preparation; this approval should state which dark details matter on each physical component.
Turn the approved proof into useful production observations
Freeze the selected artwork and identify the corresponding physical sample. Keep the rejected versions clearly marked so an old, darker file cannot be mistaken for the released file. Supply thumbnails of the critical regions with concise descriptions. A photograph of the whole puzzle is useful for identification, but it may not communicate the small tonal separation that motivated the correction.
During agreed factory testing, compare selected production pieces or sheets with the approved reference. Review the named shadow regions, visible print defects, finish and relationship to the cut. State who can decide on a deviation. If the comparison raises a question, retain the observed sample and record the lighting and viewing method before changing anything. An unexplained correction during production can create a new mismatch elsewhere in the pack.
At shipment inspection, include the finished puzzle and reference insert in selected pack checks. Confirm the artwork version, crop, component presence and visible condition. Do not infer from a few examined units that every piece has been individually checked. The sample-approval checklist helps connect these observations to the wider release record, while the dark-region notes preserve this image's specific acceptance basis.
- Released file and physical reference share one revision identifier.
- Critical shadow regions have observable review descriptions.
- Proposed paper, finish and component images are identified.
- Exceptions and approval decisions are retained with the order.
Prepare a correction brief that a print partner can use
Send the original, current print file, proposed dimensions, intended finish and annotated problem regions. Explain whether the supplied art is a photograph, scanned painting or digital illustration. State what must remain artistically unchanged and which adjustments the rights holder permits. A prepress team needs this boundary before treating a deliberately low-key image as an exposure error.
Describe the proof history in plain language: the current sample loses the railing against the background, or the stronger correction makes the sky look grey. Ask for the next comparison that resolves the remaining question. Histogram inspection can support that diagnosis, but the physical acceptance decision should remain tied to the named features and intended product experience.
Before requesting a quotation, distinguish artwork correction from manufacturing scope. Confirm who edits the file, who approves creative changes and whether another proof is required after a finish or material change. Bring those customer requirements to PuzzleZa's enquiry page. A specific brief makes the discussion more productive than asking for a perfect match to a luminous screen without identifying the image details that matter.
Use the factory discussion to clarify the proposed proof construction and review responsibilities. For example, ask whether the next object demonstrates only print appearance or the complete mounted, finished and cut product. That answer determines which observations can be approved now and which remain open. If a later material proposal changes the comparison basis, identify the affected review regions again rather than carrying forward an approval that represented a different physical surface.
Frequently asked questions
Should every dark puzzle photograph be brightened?
No. Preserve the intended mood and correct the regions that lose useful distinction. Some areas may intentionally remain solid or very dark. Review the source, selected details and representative physical proof together before changing the whole image. Global brightening can weaken highlights and make a night scene look artificial.
Can a histogram prove that the printed puzzle will look good?
No. A histogram describes the image's tonal distribution and can help diagnose available shadow information. It does not predict every effect of paper, finish, viewing light or cutting. Use it alongside visual inspection and physical proof comparisons, with specific image features named in the approval record.
What should we request when the first proof is too dark?
Request a controlled comparison using clearly identified file versions and the same proposed output conditions. Describe the lost details instead of asking vaguely for brighter printing. Confirm what each proof represents, compare selected shadow and highlight areas, and approve the correction only after reviewing its effect on the complete scene.
Should the reference poster match the dark puzzle exactly?
It should show the same approved image and crop, with useful, believable tonal relationships. Different materials or print conditions can prevent identical appearance. Review the poster beside the finished puzzle and correct distracting differences. Do not approve a bright screen rendering as proof that the printed reference will match.
Can brightening recover detail from completely black image areas?
Only if useful information remains in the source. A featureless clipped region cannot be restored by a simple brightness adjustment. Look for a better original or alternative image before inventing detail. Where the dark area is intentional, judge whether its size and position suit the intended assembly experience.
Conclusion
Successful custom puzzle dark image printing keeps the image's mood while preserving the landmarks customers need. Diagnose the source, compare restrained local corrections and approve a representative finished proof with the box and reference image. Record the selected file and critical shadow observations so production reviews can follow a concrete standard.
Prepare your art-puzzle project
Contact PuzzleZa at info@PuzzleZa.com with your artwork status, quantity scenarios, product format and proof expectations, or use the enquiry page.
Sources and scope
Sources reviewed on 2026-09-28. Manufacturing examples and review checklists are planning guidance, not claims about completed customer projects or guaranteed results. AI-generated images illustrate the topic and do not document an actual inspection.
- Adobe: histograms and pixel values — Tonal distribution and the use of selected-region histograms for diagnosis.
- Adobe: shadow and highlight detail — Clipping, local corrections and the risks of excessive adjustments.
- Adobe: proofing colours — Soft-proof reliability and its dependence on profiles, display and viewing conditions.