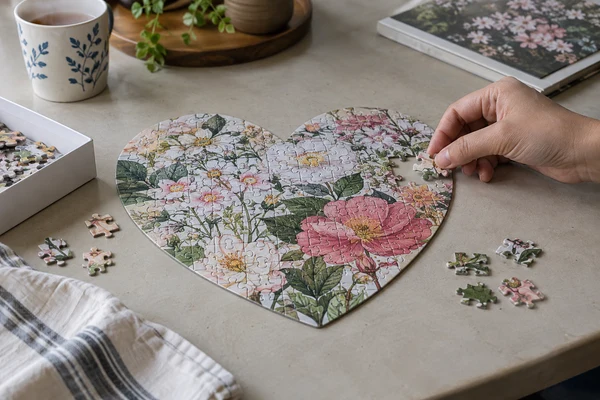
Develop a shaped puzzle by approving its silhouette, printed crop and packing interface together. A heart or animal outline changes edge cues and usable image space, while a fitted tray introduces clearance requirements that loose-piece packing does not. Confirm dimensions, local piece geometry and feasible contours with the supplier before committing to the design. This guide focuses on outline proofs and shape-to-component fit for gift brands and product teams.
Start with the silhouette and its actual product purpose
A custom shaped puzzle needs a clear outline brief before the artwork or packaging is finalized. Identify the silhouette, intended orientation and finished bounding dimensions, then explain why the shape supports the gift or retail concept. A heart, animal or other nonrectangular outline can make the object distinctive, but it also changes edge recognition, usable image area and packaging decisions. The shape should serve the product application rather than introduce complexity with no customer benefit.
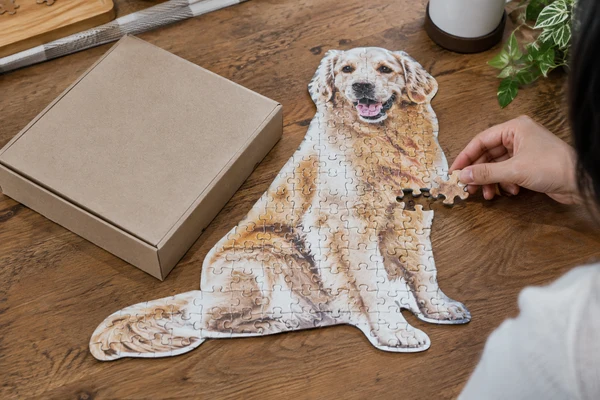
For a custom heart shaped puzzle, define the upper lobes, central notch and bottom point through an approved vector outline or supplier-confirmed drawing. Different interpretations of a heart can produce very different proportions. An animal silhouette adds features such as ears, tails or narrow legs that deserve feasibility review. Do not assume that every illustrated contour can become a practical cardboard cut. Ask the supplier to identify constraints and propose revisions before treating the outline as released artwork.
The existing shaped-puzzle guide introduces the broad format. This article narrows the workflow to outline approval, shape-to-box fit and tolerance decisions. Keep the silhouette file distinct from the artwork so changes remain visible. A beautiful image clipped into a heart on screen is a concept view, not a complete production specification or proof that the final puzzle and packaging will work together.
Define bounding dimensions, orientation and measuring points
Custom puzzle dimensions for an irregular silhouette need a measurement convention. State the maximum width and height in the intended display orientation and identify the extremities used to measure them. If the shape has projecting features, show them on the drawing. A bounding rectangle describes the outer envelope, not the area covered by cardboard or the size of every piece. Keep those distinctions clear when discussing assembly space, image scaling and the fit of an assembled sheet into a tray.
Ask which dimensions are nominal targets and which variation can be expected in the proposed construction. Do not invent a universal tolerance for shaped puzzles. The supplier should explain the measurement method and practical limits for the actual board, cut and process. A requirement that must fit a fixed accessory deserves specific review. If the accessory has no tolerance information, measure representative samples and agree the decision criteria before committing to a coordinated production order.
Ravensburger notes variation in its own finished puzzle sizes. Treat this as a reminder to confirm your specification, not as a tolerance standard for PuzzleZa. Record the drawing revision, units and measurement orientation in the approval sheet. If an outline is resized, review related inserts and packaging rather than assuming that the customer sees the same product because the silhouette name has not changed.
Approve the image inside the final contour
Place the final outline over the image before approving the crop. Critical content should remain inside the intended visible area with margins appropriate to the supplier's production requirements. A heart notch can interrupt a face or a title; an animal contour can remove useful landmarks from an otherwise suitable photograph. Review the full composition and each narrow feature. Artwork that is excellent in a rectangle may need a different layout to make the silhouette feel deliberate and readable.
Separate technical cutting lines from printable artwork in the supplied files according to the supplier's requirements. Confirm the required bleed and safe area for the actual process rather than using a generic number copied from another product. Include an exported concept view showing the intended result, but keep the controlled outline file identifiable. When the outline changes, recheck every artwork region close to the edge and any supporting reference image that depicts the finished shape.
Review a print proof at the actual proposed size. Tiny details can become difficult to interpret within a narrow feature, and a decorative border may exaggerate small registration differences. Decide whether a border is worth that sensitivity. Do not promise perfect contour-to-print alignment from a digital rendering alone. A physical sample should demonstrate the relationship between printed composition and cut outline, with any limitations recorded before the buyer approves the product for production.
Review edge cues and narrow features through assembly
Custom puzzle edge pieces in a nonrectangular format may not provide the familiar straight perimeter of a conventional puzzle. Customers can still use printed landmarks and contour fragments, but the assembly strategy changes. Inspect whether the outline creates understandable cues and whether narrow areas become confusing when separated into pieces. A memorable silhouette should remain enjoyable to assemble, rather than look recognizable only after the product team has put it together for photography.
Custom puzzle piece size should be considered locally as well as through a general average. A narrow tip, ear or stem may create unusually small or fragile-looking segments compared with the center. Ask for the proposed cut layout across those regions and discuss feasible adjustments with the supplier. Do not assume an average grid measurement guarantees consistent handling everywhere. Compare representative pieces and the assembled feature on a physical sample, especially where the visual outline depends on a thin projection.
Run an informal outline-assembly observation with an adult reviewer who has not seen the production drawing. Give them the intended reference image and ask them to build selected perimeter regions. Record confusion, orientation errors and any feature that is hard to recognize. This is a design review, not evidence of a standardized difficulty rating. Use the observations to revise the contour, image or reference. Keep claims about assembly experience specific to what was actually reviewed.
Review your silhouette and packing interface
Share the outline, artwork and any fitted accessory dimensions to discuss a feasible shaped-puzzle configuration.
Distinguish loose-piece packing from assembled-shape fit
Most loose-piece packs need sufficient bag and box space, not a cavity matching the finished outline. If the proposal includes an assembled presentation tray, fitted backing or a shaped holder, that introduces a different interface. State exactly which component must fit which other component. An outline-compatible photograph is not evidence that a tray or box recess will accept the completed puzzle. Review the matched components physically and agree the dimensions and acceptable fit together.
For a fitted component, obtain internal usable measurements and account for all projecting features in the intended orientation. Check how the customer places and removes the puzzle without catching a narrow tip. Ask the supplier to propose workable clearance based on the actual construction. Avoid setting a universal gap or requiring a friction fit without reviewing the consequences. The correct clearance must balance placement, visible presentation and the variation expected in the coordinated components.
For loose packing, use the actual pieces, filled containment and inserts. A distinctive silhouette may need a reference that explains the finished shape, but that reference still has to fit the box. Check whether the outer box image shows the contour accurately and whether the customer can understand the intended orientation. A rectangular retail box can be entirely suitable for a shaped puzzle; a contour-shaped retail container should be pursued only when it serves a practical role and is confirmed feasible.
| Interface | What to specify | Physical review |
|---|---|---|
| Artwork to outline | Contour revision and crop | Printed cut sample |
| Loose pieces to box | Filled bag and inserts | Opening and repacking |
| Assembled shape to tray | Envelope and usable cavity | Placement and removal |
| Retail pack to carton | External pack arrangement | Complete carton sample |
Approve the shape-to-component interface as a system
A coordinated puzzle and fitted accessory needs an explicit interface record. Identify puzzle outline revision, nominal bounding dimensions, accessory internal dimensions and the agreed measurement approach. Ask the parties responsible for both components to review the fit together. Two individually acceptable parts can still form an unacceptable pair if their requirements were defined independently. A clear record avoids the assumption that the accessory manufacturer can infer clearance from a marketing image or piece count.
Compare representative combinations rather than only the one pair arranged for a presentation photograph. Where practical, measure several relevant samples and note variation without presenting the exercise as a statistical guarantee. Examine contact points and access at projecting features. If a product fits only after bending a tip or pressing down a corner, return to the construction brief. The objective is a fit that works through the agreed range, not an isolated sample that looks convincing on camera.
FEFCO's design code offers common terminology for the corrugated shipping container. Use it when discussing outer cartons and keep that specification separate from the shaped-product interface. A master carton that protects a rectangular retail pack does not define the clearance of a fitted tray. The different measurements serve different jobs, and the approval record should prevent one drawing from being used as a substitute for another.
Record a fit decision with its limits
Name the components measured, the orientation used and the observation that supports approval. If the trial uses temporary backing or representative board, state that limitation. This prevents a successful concept demonstration from being mistaken for confirmation of the final production interface.
 PuzzleZa
Use staged proofs and a complete released reference
Begin with a contour drawing and artwork overlay, then review physical evidence appropriate to each decision. A plain cut sample can expose difficult outline features, while a printed sample demonstrates the final composition. A complete packed sample confirms loose-piece containment or the intended accessory fit. Mark which materials and processes are representative. Do not let approval of one stage silently approve every later stage, especially where a fitted component or delicate-looking silhouette is part of the concept.
Use the factory discussion to agree the sample scope and practical factory testing. Review outline registration, visible cut condition, representative assembly and packing against the released reference. At shipment inspection, check selected finished packs for the correct silhouette, components and supporting image. Define the scope and document exceptions. A full silhouette shown in an illustrative image is not proof that actual production samples were tested or that every unit was assembled.
Treat outline changes as product changes. A revised heart notch or animal tail can affect image crop, cut layout, dimensions, poster and fitted accessory. List affected components in the change record and seek the relevant approvals before release. Keep old files out of the active packing folder while preserving them for traceability. For reorders, identify the accepted outline revision explicitly rather than asking only for the same shaped puzzle and relying on a visual memory of the original sample.
Send a feasibility brief with fixed and flexible requirements
A useful custom-shaped puzzle brief includes the vector silhouette, source artwork, intended count, size target, quantity scenarios and destination. Explain whether the puzzle will be supplied loose, displayed assembled or paired with an accessory. Mark critical dimensions and features that can be revised. If the supplier proposes a change, compare it against the product purpose rather than automatically accepting the closest visual approximation.
Provide the packaging concept and any fixed accessory drawings at the first feasibility discussion. A fitted tray introduced after outline approval can force a second development cycle. Ask the supplier to identify feasible contour adjustments, sample stages and any limitations of the proposed cut platform. Keep the technical information distinct from the customer copy, which should explain the finished shape and dimensions clearly without exposing unnecessary production terminology or making unsupported precision claims.
Submit the coordinated files through PuzzleZa's enquiry page. Ask for a proposal that makes outline, artwork and packing decisions reviewable before quantity commitment. The final product should have a recognizable silhouette, workable edge experience and confirmed component fit. A narrower but feasible outline can be a stronger gift product than an intricate concept that depends on unverified material behavior or an accessory that only fits the first sample.
Frequently asked questions
Does a shaped puzzle need a shaped box?
No. A rectangular box can contain the loose pieces and reference image appropriately. A contour-shaped container introduces another design and feasibility decision. Choose it only when it supports the customer use and can be confirmed through a complete packed sample.
How are irregular puzzle dimensions described?
Use the maximum width and height in the agreed display orientation, identifying the measuring points on a drawing. These describe the outer envelope, not the area of every piece. Ask the supplier to confirm nominal dimensions, expected variation and any special requirement for a fitted accessory.
Can an intricate animal outline be produced exactly as drawn?
Do not assume so. Narrow projections and local cut geometry need supplier review for the proposed cardboard construction. Provide the silhouette and explain which features are essential. Consider feasible revisions before artwork release, then inspect the physical sample rather than relying on the clipped digital concept.
How much clearance should a fitted tray have?
There is no universal allowance. Coordinate the puzzle and tray dimensions, materials and expected variation, then review representative matched samples. Check placement, removal and contact points. Ask the responsible manufacturers to propose a workable interface rather than setting a gap from an unrelated product.
What changes when a heart outline is resized?
Potentially the crop, piece geometry, completed dimensions, reference image and fitted component. Review all affected files and samples under a new revision. Loose-piece packaging may also need a filled-fit check. A simple scale adjustment on screen does not establish that the complete product remains approved.
Conclusion
A shaped puzzle works when contour, image and component fit support the same intended use. Approve identifiable outline revisions, review local geometry and distinguish loose-piece packing from fitted interfaces. A coordinated physical reference makes the result more credible, easier to manufacture and clearer for the customer.
Prepare a coordinated shaped-puzzle brief
Send the count, size target, quantities and packaging concept for a project-specific feasibility and sample discussion.
Sources and scope
Sources reviewed on 2026-10-09. Manufacturing examples and review checklists are planning guidance, not claims about completed customer projects or guaranteed results. AI-generated images illustrate the topic and do not document an actual inspection.
- Ravensburger puzzle FAQ — Manufacturer-specific examples showing why count and dimensions need confirmation.
- FEFCO packaging design code — Shared terminology for corrugated outer shipping container designs.