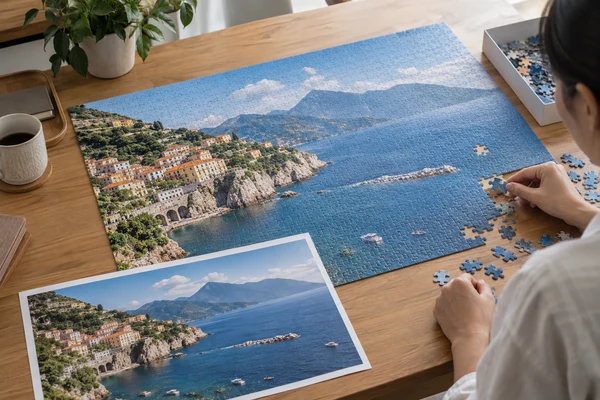
Custom puzzle resolution requirements should be calculated from the pixels remaining after cropping and the final printed dimensions. A file labeled 300 dpi can still be unsuitable if it contains too few pixels, while a high-resolution original can lose detail when heavily cropped. Start with the full-quality source, determine the final crop and calculate effective pixels per inch at the intended size. Then inspect detail and approve a representative print. This guide concentrates on enlargement and crop decisions, rather than repeating a general artwork handover checklist. It helps photo-gift teams, art publishers and retailers understand what their files can realistically support before committing to a puzzle format.
Understand pixels, PPI and the 300 dpi shorthand
Image pixels are the samples that describe a raster photograph. Pixels per inch, or PPI, relates those samples to printed size. Printer dots per inch, or DPI, describes an output device's marking capability. Buyers commonly use custom puzzle 300 dpi to mean a file prepared at roughly 300 image pixels per inch, but the factory should clarify its expected file specification and workflow.
Adobe explains printed image resolution through the relationship between pixels and physical dimensions. The practical buyer question is how many genuine source pixels occupy each inch of the final artwork. An image does not become more detailed because its metadata field is changed from a lower number to a higher one.
A resolution target is an output planning choice, not a universal guarantee of quality. Viewing distance, image content, printing method and the intended customer experience matter. Fine architecture or facial details may expose weaknesses that an abstract watercolor conceals. Ask the supplier for its recommended range at the proposed format and assess a proof instead of accepting or rejecting every image on one number.
Request the useful file facts
Record source width and height in pixels, final print width and height, crop ratio and whether resampling has already occurred. These facts are more informative than file size in megabytes alone. A large compressed file can still contain weak detail, and a smaller clean file may suit a more modest print format.
Calculate effective resolution at the finished size
Use effective PPI equals pixel dimension divided by print dimension in inches. Convert millimeters to inches by dividing by 25.4. Perform the calculation for both directions after matching the crop ratio. If one axis has a lower result, that value can constrain the layout. Do not calculate from a larger uncropped original when the approved design uses only part of it.
Consider a hypothetical 6000 by 4000 pixel photograph printed at 600 by 400 millimeters. The print is approximately 23.62 by 15.75 inches, giving about 254 PPI on both axes before extra bleed or cropping. At 300 PPI, that print area would need approximately 7087 by 4724 pixels. These are calculations for an example layout, not PuzzleZa's standard puzzle sizes or mandatory production thresholds.
If the designer uses only a 4200 by 2800 pixel crop from that photograph, the same 600 by 400 millimeter area receives about 178 PPI. Enlarging the original canvas does not change what remains in the crop. Repeat the calculation when a customer asks for a closer view of a person or landmark. That apparently small creative request can remove a substantial portion of the usable source.
Check bleed separately. The manufacturer's required artwork area can be larger than the final trimmed face. Calculate against the real placed image size, including the extension needed for that output, rather than assuming the trimmed dimensions are sufficient. If the source lacks image beyond the crop, agree an appropriate design solution; stretching an edge or inventing detail may change the approved photograph.
| Source after crop | Printed area | Approximate effective PPI |
|---|---|---|
| 6000 × 4000 pixels | 600 × 400 mm | 254 |
| 4200 × 2800 pixels | 600 × 400 mm | 178 |
| 3000 × 2000 pixels | 300 × 200 mm | 254 |
| 7087 × 4724 pixels | 600 × 400 mm | 300 |
Choose the crop before promising a puzzle format
Match the image ratio to the proposed puzzle face. A square photograph does not fill a wide rectangle without cropping, adding space or distorting the image. Distortion is usually a poor solution for people, architecture and recognizable products. Give the buyer a crop preview with the finished boundary and required safety area before treating the file as ready.
Protect important content from the cut edge and any required bleed. A face close to the original boundary may leave little room for a clean print extension. Landmarks, signatures and licensed image credits deserve individual review. Ask the image owner to approve the final composition, because technical cropping can change the meaning or licensed presentation of an artwork.
The best resolution for custom puzzle projects is therefore tied to a selected crop and physical size, not an abstract maximum. A smaller print may preserve a treasured image better than a large format. Alternatively, a border or collage can reduce the enlargement of individual images. Confirm the artistic and commercial implications rather than choosing a layout only to satisfy a numerical target.
Keep a crop record
Save the approved crop preview and the source identifier alongside the print file. If the box or reference poster uses another ratio, approve that crop separately. Use the art puzzle format as a discussion reference, then confirm its actual dimensions before making pixel calculations.
Inspect the source for problems resolution cannot fix
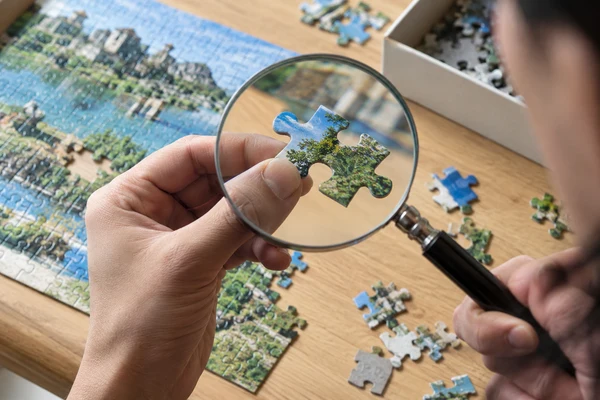
Pixel count does not tell you whether the photograph is sharp. Camera movement, missed focus, heavy noise reduction and poor lighting can leave a large image with little useful detail. Inspect important areas at an appropriate magnification, especially faces, fine lettering and repeating textures. Record the concern as an image-quality issue rather than assuming a higher PPI value will solve it.
Watch for compression damage from messaging apps, social media downloads and repeatedly saved JPEG files. Block edges, ringing around high-contrast details and smeared texture can become more obvious when enlarged. Ask for the original camera export or licensed high-quality master if available. A screenshot of the image in a gallery is not equivalent to the underlying full-resolution file.
For scans of older photographs, review dust, scratches, color fading and the capture's sharpness. Scanning at a high setting can faithfully record defects and paper texture without adding original scene detail. Keep restoration decisions separate from technical output preparation. A restored face or reconstructed background may require explicit approval from the customer or rights holder.
Describe quality honestly
When reviewing custom puzzle image quality, use specific observations such as soft eyes, visible JPEG blocks or missing shadow detail. These are more useful than calling the file low quality. They guide the next action: request a better original, select a smaller format, revise the crop or approve the limitation knowingly.
Check your image before choosing a format
Share the source pixel dimensions, intended crop and proposed puzzle size. Ask which output requirements and proof can support a realistic image-quality review.
Treat enlargement as an evaluated edit, not recovered truth
Resampling creates a new pixel grid by estimating values from existing information. It can improve the appearance of an enlargement, but it does not recreate the original camera data. Adobe distinguishes resizing from resampling. Use that distinction when discussing whether a larger exported file is genuinely a better source.
Compare an enlarged version with the original crop at the intended print scale. Inspect hair, foliage, repeated windows and fine text for unnatural reconstruction or excessive smoothing. AI-based enlargement may invent plausible details, which can be unacceptable in portraits, artwork or factual images. Do not describe generated texture as newly recovered photographic evidence.
Sharpening also needs restraint. Strong edge contrast can make a small preview look crisp while producing halos on print. Noise removal can make skies smoother while erasing subtle textures needed for an engaging puzzle. Ask the prepress reviewer which final output treatment is appropriate and retain an untreated master. Avoid repeatedly enlarging and sharpening the same image through several handovers.
If the result remains unsuitable, select a smaller print area or a different image rather than hiding the limitation with a larger pixel count. A project-specific proof can help the buyer choose between alternatives. Confirm whether that proof represents production printing and finishing, because a desktop print may answer composition questions without establishing the final appearance.
Build a proof that answers the real quality question
Decide which details will determine acceptance. A scenic image may depend on distant buildings and shadow separation; a family photograph may depend on faces; a licensed illustration may depend on linework and signature placement. Print representative regions at the intended physical scale when the supplier can support that approach. A reduced whole-image proof can conceal the very problem being evaluated.
Compare the proof under suitable, consistent lighting and at realistic viewing distances. Ask the buyer to review both the close detail and the overall composition. A puzzle is often handled and inspected closely during assembly, so tiny features may matter more than they would on a wall poster. Still, do not impose a laboratory claim or a fixed quality threshold without an agreed method.
Record what was approved: crop, image treatment, detail quality, color and any accepted limitations. Identify the proof process and material, and mark provisional proofs accordingly. Our sample approval guide covers the wider product review. The resolution decision should remain traceable within that record rather than living only in an informal designer comment.
Separate image approval from physical quality
A photograph can print acceptably while the board, cutting or box still needs review. Conversely, excellent construction cannot repair a blurred image. Give each category its own decision and evidence. Ask about the order's intended factory testing through the factory overview without assuming a particular checking procedure is included.
 PuzzleZa
Prepare one controlled full-quality file handover
Keep the original source, approved crop and final output file as distinct assets. Name them clearly and record the version that production should use. Avoid asking the factory to retrieve the print image from a presentation slide or a messaging preview. Use a transfer method that preserves the actual file rather than recompressing it automatically.
Confirm dimensions, output format, color preparation and bleed against the factory instructions. Include linked assets when the requested editable layout requires them, subject to licensing. Check the final exported file for accidental downsampling, because PDF presets intended for email can reduce embedded images. A high-resolution working file does not prove the delivered PDF contains the same detail.
Review the box cover and reference image separately. They may use a different crop or smaller reproduction, and the buyer should approve each use. If the puzzle face changes, update the related files deliberately. A mismatch between box and puzzle can mislead the customer even when both images are technically sharp. Use the general artwork checklist for a complete handover.
Send the evidence with the enquiry
Through the project enquiry page, provide source pixel dimensions, desired physical size and an approved crop preview. If you cannot transfer the master initially, disclose that the preview is provisional. This lets the supplier discuss feasibility without treating a compressed sample as the final production artwork.
Apply the calculation across a photo or art range
The question what image quality do I need for a custom puzzle should be answered for each artwork, not once for an entire collection. Two photographs captured by the same camera can have different crops, focus and noise. Keep a simple review sheet that lists source dimensions, final crop dimensions, printed area, effective PPI and proof decision.
A hypothetical three-image retail collection might retain a wide coastal view, use a tighter city crop and reduce the size of an older portrait. Apply the same review method to all three while allowing different outcomes. This creates a defensible product decision without pretending that every supplied file meets one identical quality standard. Clearly label such planning examples as examples, not completed factory work.
Consider the assembly experience alongside technical sharpness. Large blank skies or repeated textures can be difficult even in a clean print. If that challenge conflicts with the audience, revise the composition or format. Select the physical options through the custom puzzle range, then calculate resolution again after the size and crop are confirmed.
Review before repeat production
Retain the approved source and output files for reorders. Check whether a new crop, print size or image treatment is proposed, and avoid rebuilding the file from an old website image. Resolution calculations are quick, but preserving the correct master is often what prevents an avoidable deterioration in the next edition.
Frequently asked questions
Does a 300 dpi label guarantee enough detail?
No. Check pixel dimensions and the physical print size after cropping. Changing metadata alone does not add image information. Confirm the supplier's expected effective resolution and review a representative print for actual sharpness, noise and compression.
How do I calculate the required pixels?
Convert the print dimension to inches and multiply by the target PPI. Repeat for both width and height using the intended artwork area. Include the supplier's required bleed and check that the source can support the approved crop without distortion.
Can a smartphone photo be used for a large puzzle?
Potentially, if the original file, crop and detail are suitable at the proposed size. Camera origin alone is not a quality verdict. Request the full-quality original, calculate effective PPI and examine focus, noise and compression before approving an enlargement.
Is AI enlargement always acceptable for puzzle photos?
No. It may improve apparent detail while inventing or changing features. Review important faces, text and artwork carefully and obtain the relevant approval. Do not present reconstructed details as faithfully recovered information from the original scene.
What should we do when the source is too small?
Request a better original, reduce the print area, change the crop or use an approved design treatment such as a border. If enlargement is proposed, compare a proof at realistic scale and document accepted limitations instead of relying on a larger exported pixel count.
Conclusion
The useful resolution decision combines arithmetic with visual evidence. Calculate from the approved crop and final size, inspect the genuine source detail and retain the proof decision with the released file. This gives photo and art buyers a clearer basis for format selection than a 300 dpi label or a large file attachment alone.
Build a print-ready photo puzzle brief
Contact PuzzleZa with your artwork status, audience and quantity scenarios. A full-quality source and clear crop make product and sampling discussions more useful.
Sources and scope
Sources reviewed on 2026-10-09. Manufacturing examples and review checklists are planning guidance, not claims about completed customer projects or guaranteed results. AI-generated images illustrate the topic and do not document an actual inspection.
- Adobe: Printed image resolution — Relationship between pixel count, resolution and printed dimensions.
- Adobe: Image size, resolution and resampling — Difference between resizing and creating additional pixels.